Managing Environments
This section describes how you can create and manage your environments in the masking service.
As a reminder, environments are used to group certain sets of objects within the masking engine. They can be thought of as folders/containers where a specified user can create manage connectors, rulesets and jobs.
The main environment screen lists all the environments the logged in user has access to. It is the first screen that appears when a user logs in to Delphix.
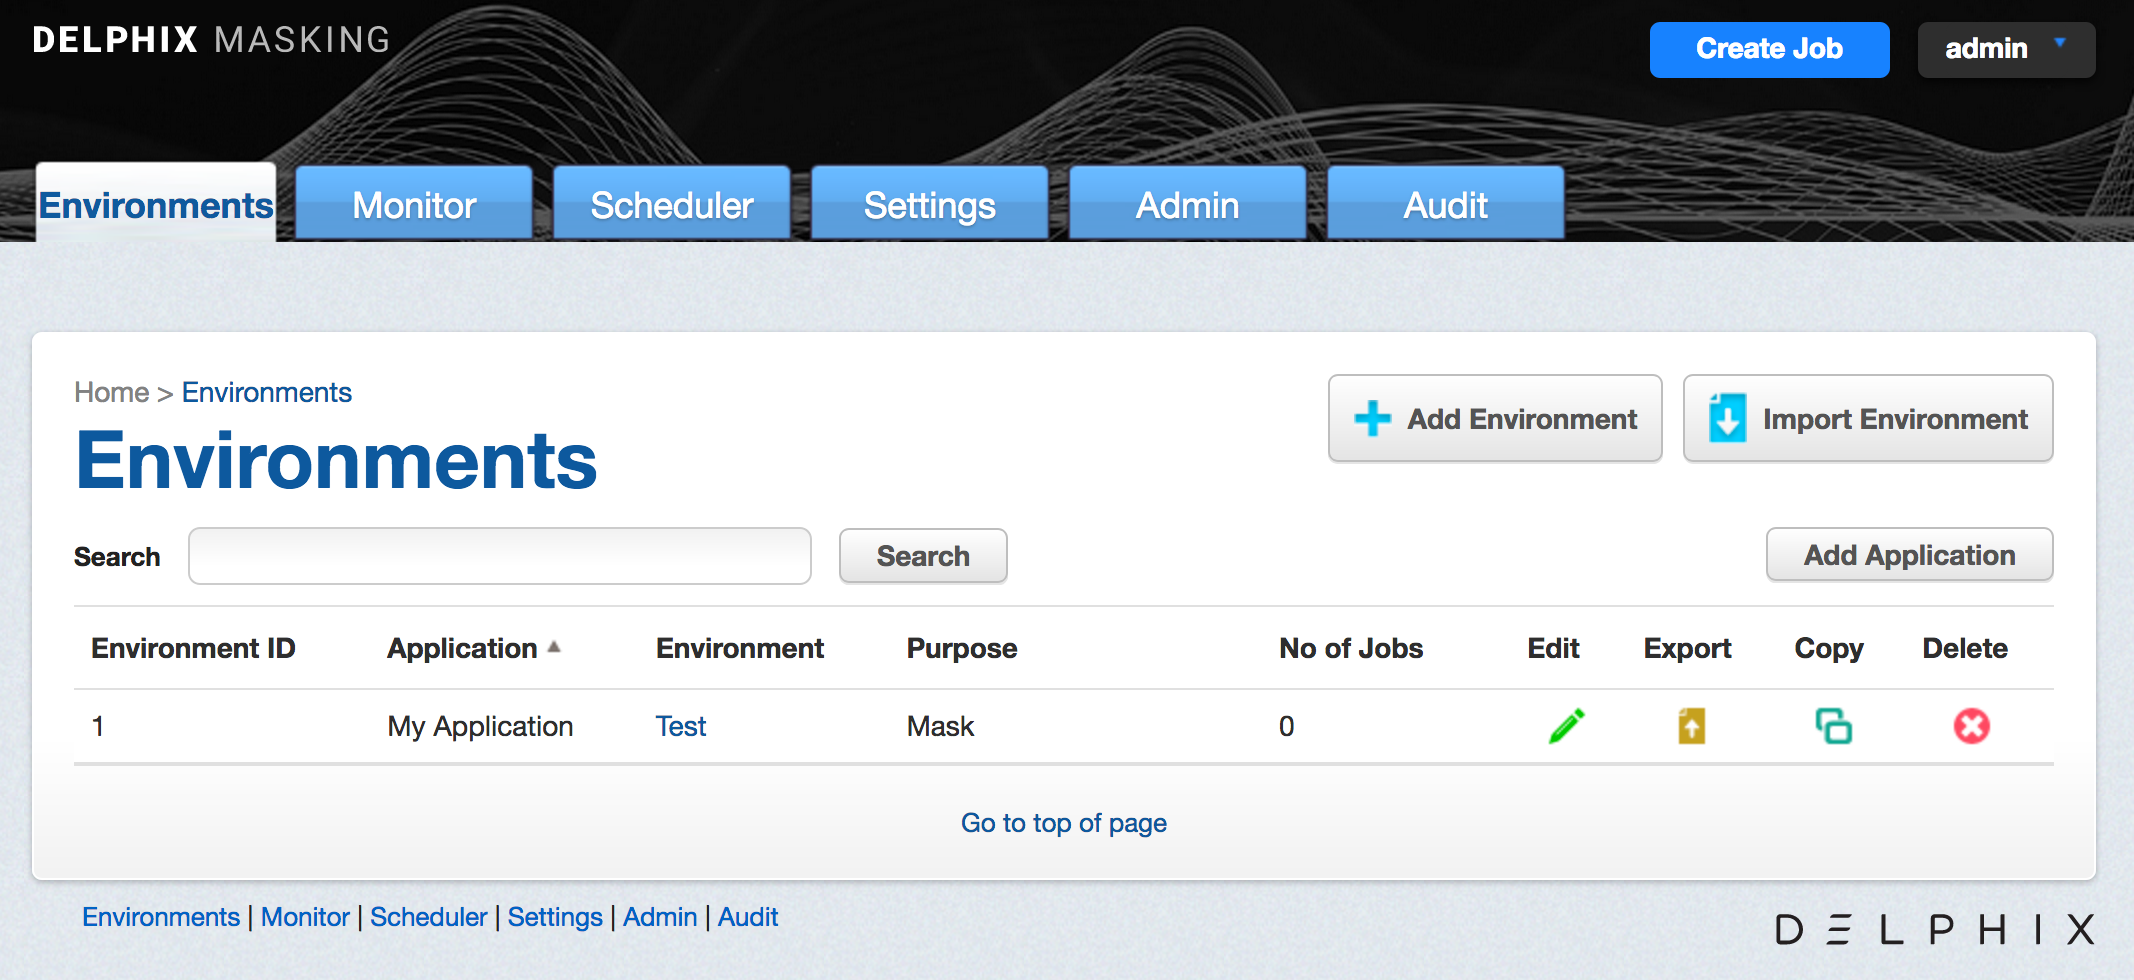
The main environments screen contains the following information and actions:
-
Environment ID — The numeric ID of the environment used to refer to the environment from the Masking API.
-
Application — A way to indicate the name of the application whose data will be managed within this environment.
-
Environment — The name of the environment.
-
Purpose — The purpose of the environment.
-
Jobs — The number of jobs contained within the environment.
-
Edit — Edit the environment. See more details below.
-
Export — Export the environment. See more details below.
-
Copy — Copy the environment. See more details below.
-
Delete — Delete the environment. See more details below.
The environments on the screen can be sorted by the various informational fields by clicking on the respective field. In addition, the environments listed can be filtered using the Search field. See more details below.
Adding An Application
For an environment to be created, an application needs to be specified. Here are the steps to add an application:
-
On the main environments page, near the upper right-hand corner of the screen, click Add Application.
-
The screen prompts you for the following items:
a. Application Name
-
Click Save to return to the Environments List/Summary screen.
Creating An Environment
Here are the steps you need to take to create an environment:
-
On the main environments page, in the upper right-hand corner of the screen, click Add Environment.
-
The screen prompts you for the following items:
-
Application Name – The name of the application to associate with the environment, for informational purposes.
-
Environment Name – The display name of the new environment.
-
Purpose – The type of masking workflow for the environment: Mask or Tokenize/Re-Identify.
-
Enable Approval Workflow – Whether or not to require approvals of inventories before masking jobs can be run in the environment.
-
Either click Save to return to the Environments List/Summary screen, or click Save & View to display the Environment Overview screen.
Editing an Environment
To change the properties of an environment, do the following
-
Click the Edit icon to the right of the environment status.
-
The popup prompts you for the following information:
a. Environment Name
b. Purpose
c. Application Name
d. Enable Approval Workflow
-
Click Save.
Exporting an Environment
For a variety of different reasons (the main one being moving environments between masking engines), you may want to export all the objects within an environment (connectors, rulesets, masking jobs, etc).
To export an environment, you have 2 different options. The first is to use Delphix’s open source Masking Initializer command line tool that can be used to backup and restore a masking engine using the APIv5 endpoints. This tool is recommended when you are trying to backup/export all objects on the engine.
The second option, which will be outlined here, is to use the Export Environment option available in the Masking UI. To export an individual environment:
-
Click the Export icon.
-
The popup fills in the following items:
a. Environment Name
b. File Name.
-
Click Export.
All the information for the specified environment (connectors, rule sets, inventory, jobs, and so on) is exported to an XML file.
A status popup appears. When the export operation is complete, you can click on the Download file name to access the XML file.
Importing An Environment
Once you have exported your environment, you can easily import it into another masking engine. To import an environment:
-
In the upper right-hand corner of the screen, click Import Environment.
-
The screen prompts you for the following items:
-
Application Name – The name of the application associated with this environment, for informational purposes. (An integrated test environment can have multiple applications.
-
Environment Name – The name of the environment that you want to import.
-
Purpose – The way the environment is used in the development process: Development, Gold Copy, QA, Training, and so on.
-
Enable Approval Workflow – Whether or not to require approvals of inventories before masking jobs can be run.
-
Select… – Use to browse for the XML file that contains the information you want to import. (This file must be a previously exported Delphix Agile Data Masking environment.)
-
Either click Save to return to the Environments List/Summary screen, or click Save & View to display the Environment Overview screen.
Copying An Environment
A user can also easily create an exact copy of a certain environment. This is a very powerful feature when wanting to have several similar but not exact environments but don't want to start from scratch. To copy an environment do the following:
-
Click the Copy icon to the right of the environment status.
-
The popup prompts you for the following information:
a. Environment Name
b. Purpose
c. Application Name
d. Enable Approval Workflow
-
Click Save.
Deleting An Environments
To delete an environment:
- Click the Delete icon to the right of the environment status and copy icon.
Warning
Clicking the Delete icon deletes EVERYTHING for that environment: connections, inventory, rule sets, and so on. It does not delete universal settings like algorithms, domains, etc.
Searching For Environments
When a large number of environments have been created on a masking engine, it may be useful to filter the Environments List/Summary screen. To filter the environment list, do the following:
-
In the Search field in the upper left side of the screen, enter the characters to search by.
-
Click the adjacent Search button.
-
The screen will display only the environments whose name match the specified search characters.
To re-display the entire list of environments, clear the Search field of characters and click the Search button again.