Managing File Formats
File formats
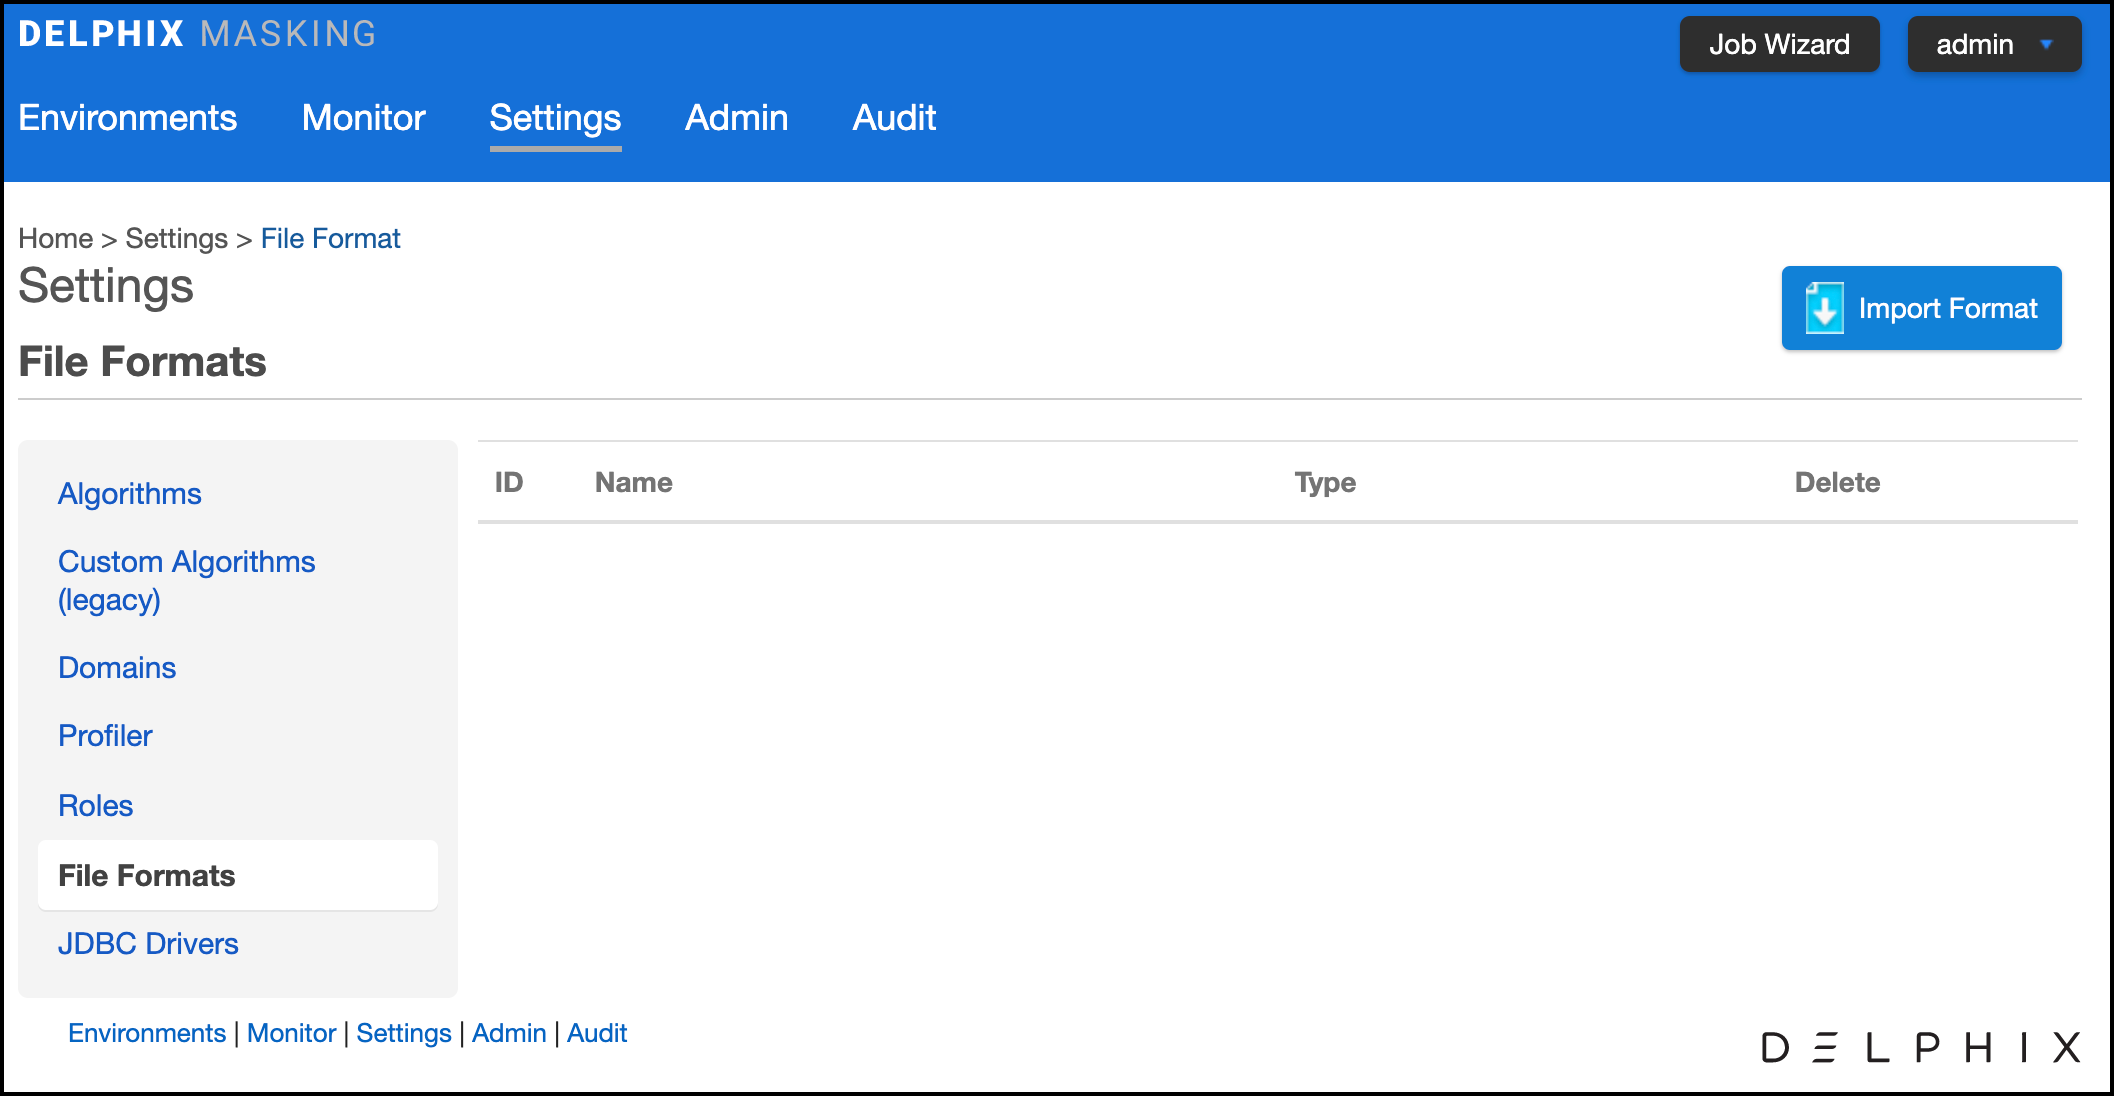
Unlike database files for the most part do not have built-in metadata to describe the format of the fields in the file. You must provide this to Delphix so it can update the file appropriately. This is done through the settings tab where you will see a menu item on the left for File Format. Select File Format and you will see an option to import a file format. This will depend on the type of file and how you want to let Delphix know the format of the file.
Mainframe data sets and XML Files
For Mainframe data sets, you can specify the file format via the Import Format button which will import the copybook directly into Delphix. You can input this file from a Filesystem Mount Point, SFTP server, FTP server, or via upload. Please select Copybook as the Import Format Type.
For XML files you can also import the file format with the input format option which will import the file directly into Delphix. You can use the file you want to mask as the format. You can input this file from a Filesystem Mount Point, SFTP server, FTP server, or via upload. Please select XML as the Import Format Type.
Delimited and Fixed files
For Delimited and Fixed files you can import a text file that describes the structure of the file to Delphix.
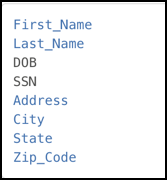
To input the file format for delimited files, create a text document with the column names each on its own line. For example:
- Name
- Address
- City
- State
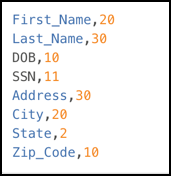
To input the file format for fixed files, create a text document with the column names and the length of each column on its own line. For example:
- Name,25
- Address,40
- City,20
- State,2
Then input this file as the file format. The name of the text file will be the name of the file format.
NOTE - Column length Mismatch between Fixed File and File Format
For Fixed Files, caution should be taken to ensure that the column length is in accordance with the File Format definition. Failure to do so will result in masking a column with the incorrect offset, which would have the unintended consequence of not masking what was intended.
NOTE - Behavior when the number of fields in a delimited file's format and contents are mismatched
The behavior is this case is as follows:
-
If the total number of fields in the Delimited File is less than the total number of fields in the File Format, then after masking, delimiter will be added to match the total fields with File Format. See the below example,
Format: One, Two, Three
Delimited File Data: Test Data1, Test Data2
Result after masking: Test Data1, Test Data2, (One extra delimiter will be added to match with the File Format column length). -
If the total number of fields in the Delimited File is greater than the total number of fields in the File Format, then after masking the extra fields in the Delimited File will be lost. See the below example,
Format: One, Two, Three
Delimited File Data: Test Data1, Test Data2, Test Data3, Test Data4
Result after masking: Test Data1, Test Data2, Test Data3
NOTE - Multi-byte Characters
For Fixed Files, column length is determined by the number of characters rather than the number of bytes.
To Import a New File Format
- Click Import Format at the upper right. The Import File Format window appears.
- Select an Import File Type.
For a Format Type of Copybook or XML
- Select a Connection Mode.
- Fill out the required fields of the selected Connection Mode. For Filesystem Mount Point connection mode, refer to the Managing Remote Mounts page to fill out the required fields.
- Click Browse.
- Click the Select button to the right of the desired import file format.
- Enter a Logical Name.
- Click Submit.
For a Format Type of Delimited File, or Fixed Width File
- Click Select.
-
Browse for the file from which to import fields.
Note
The contents of the imported file vary for Delimited, Fixed Width, Copybook (Mainframe), and XML types.
-
Click Save.
Note: - The file must have NO header. - Make sure there are no spaces or returns at the end of the last line in the file. - To be masked, the field names must be in the same order as they are in the file.
Removing a Selected File
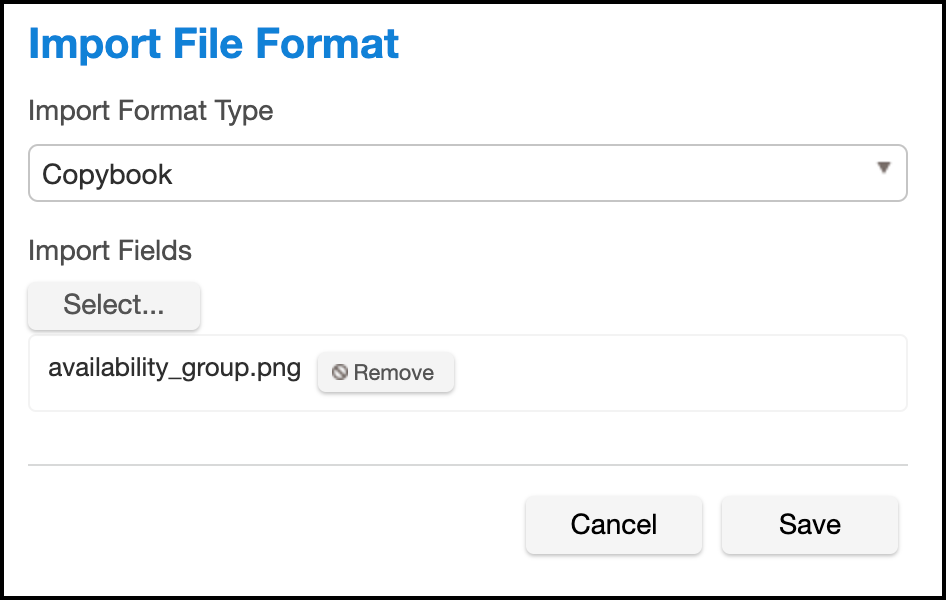
If you accidentally selected an incorrect file, simply click the Remove button to the right of the file and repeat the selection steps above.
Samples
The following is sample file content for Delimited file formats. With these formats, just the field name is provided. Notice there is no header and only a list of values.
The following is sample file content for Fixed Width format. In this format, the field name is followed by the length of the field, separated by a comma. Notice there is no header and only a list of values.
To Delete a File Format
- Click the Delete icon to the right of the File Format name.
- File inventory is based on file format. Therefore, if you make a change to a file inventory, that change applies to all files that use that format.
- You can only add or delete a file format; you cannot edit one.
Assigning a File Format to a files
Once you create a rule set with a file or set of files, you will need to assign those files to their appropriate file format. This is accomplished by editing the rule set. When you click on the edit button for the file a pop-up screen called edit file will appear with the file name. There will be a drop-down for the format so you can select the proper format for the file. If the file is a Mainframe data sets file with a copybook you will see a checkbox to signify if the file is variable length. For all other file types, select the end-of-record to let Delphix know whether the file is in windows/dos format (CR+LF) or Linux format (LF). If the file is a delimited file you will have a space to put in the delimiter. If there are multiple files in the ruleset you will have to edit each one individually and assign it to the appropriate file format.