Configuring Your Own Algorithms
This section describes how users can configure their own algorithms using Delphix’s built in algorithm frameworks.
Algorithm Settings
The Algorithm tab displays algorithm Names along with Type and Description. This is where you add (or create) new algorithms. The default algorithms and any algorithms you have defined appear on this tab.
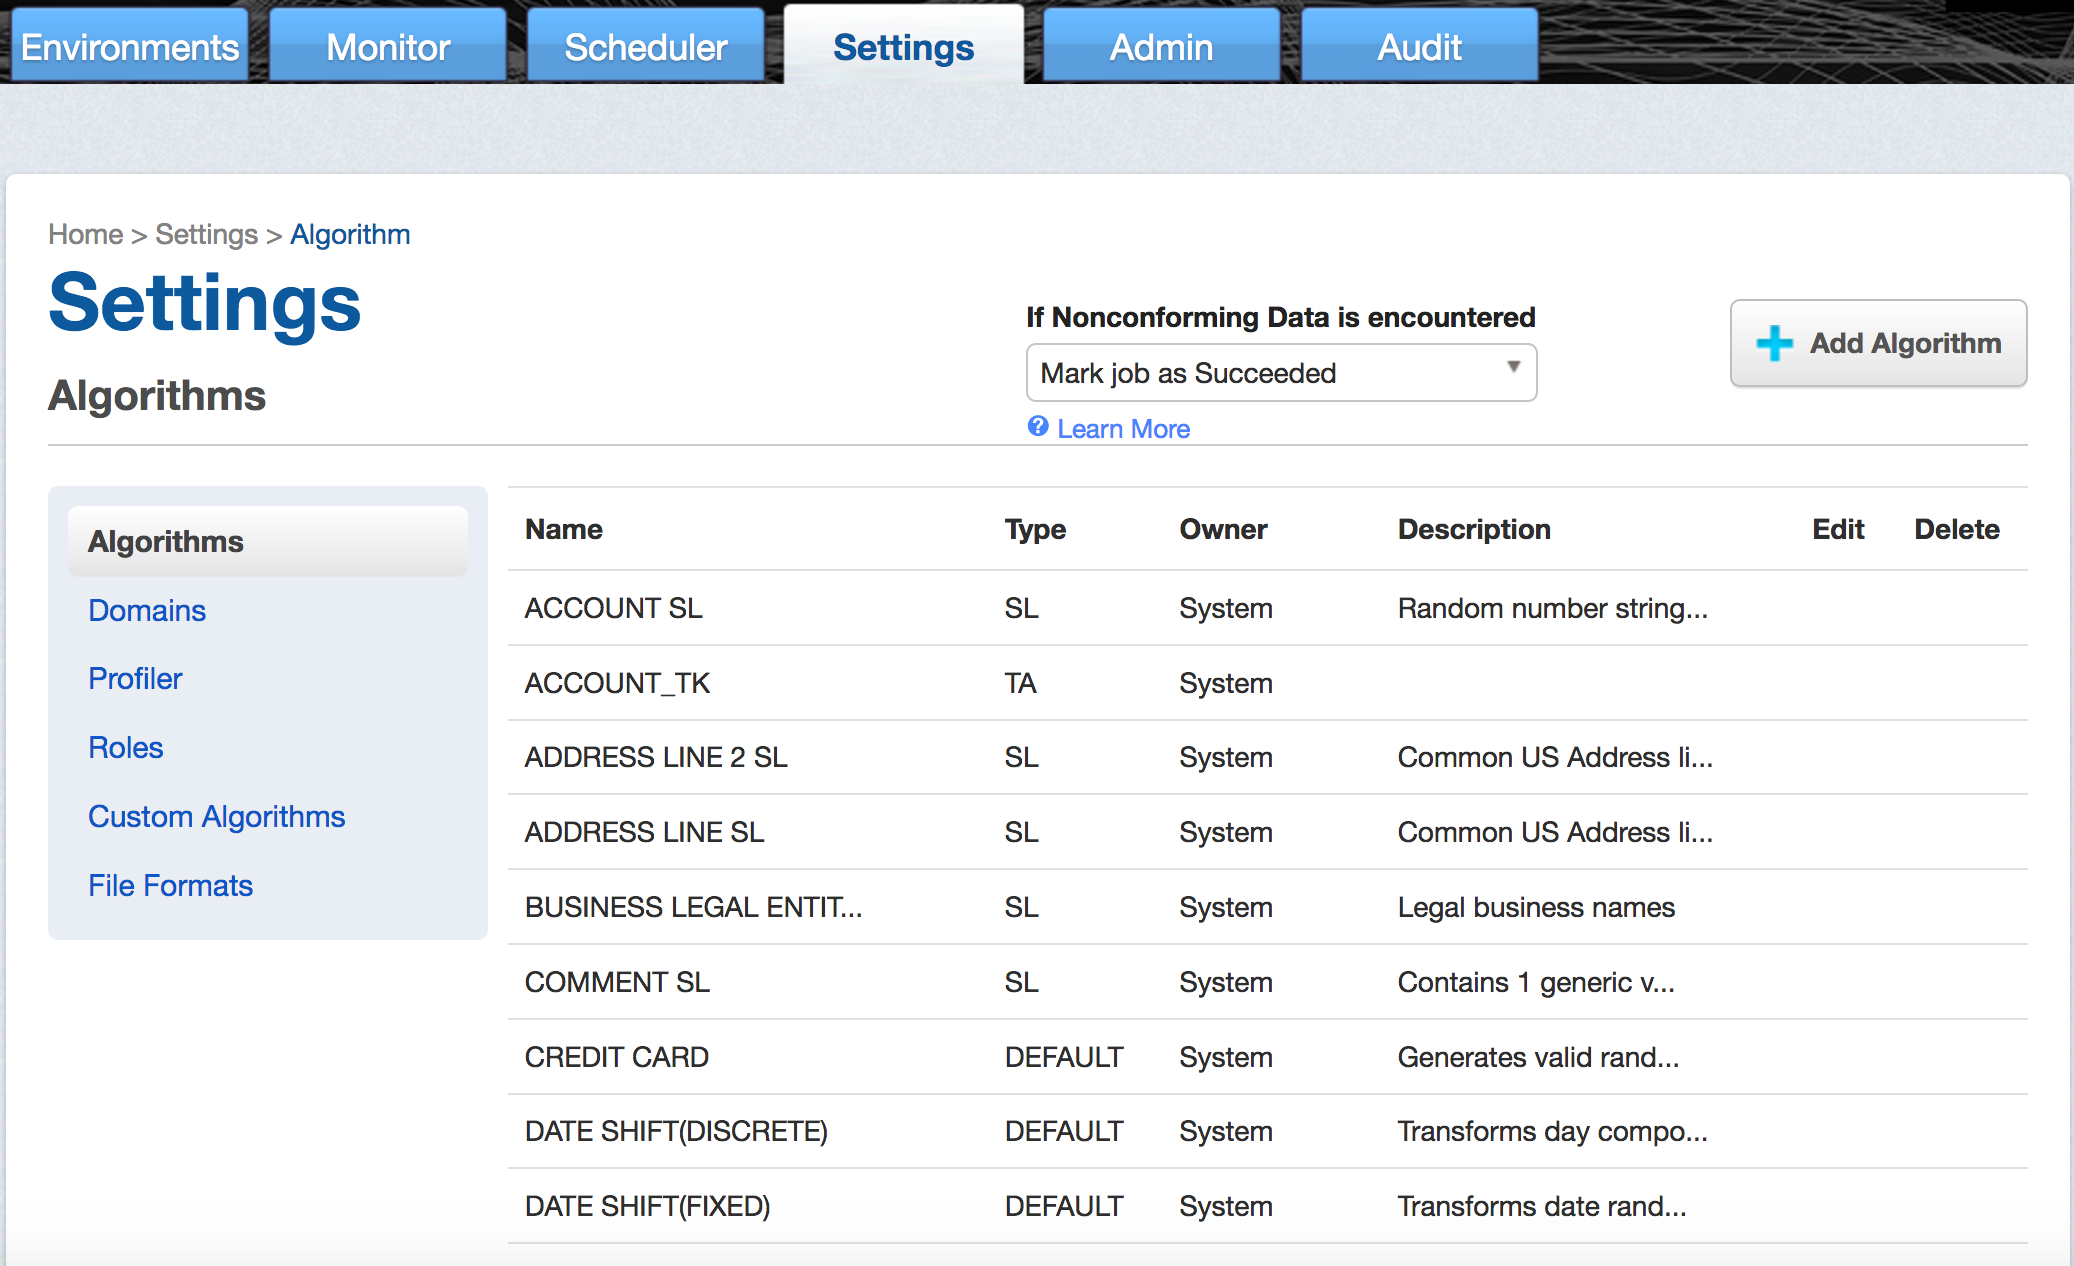
At the top of the page, If Nonconforming data is encountered is displayed to specify how all algorithms should behave if they encounter data values in an unexpected format. Mark job as Failed instructs algorithms to throw an exception that will result in the job failing. Mark job as Succeeded instructs algorithms to ignore the nonconforming data and not throw an exception. Note that Mark job as Succeeded will result in the nonconforming data not being masked should the job succeed, but the Monitor page will display a warning that can be used to report the nonconforming data events.
Creating New Algorithms
If none of the default algorithms meet your needs, you might want to create a new algorithm.
Algorithm Frameworks give you the ability to quickly and easily define the algorithms you want, directly on the Settings page. Then, you can immediately propagate them. Anyone in your organization who has the Delphix Masking Engine can then access the information.
Administrators can update system-defined algorithms. User-defined algorithms can be accessed by all users and updated by the owner/user who created the algorithm.
To add an algorithm:
-
In the upper right-hand corner of the Algorithm settings tab, click Add Algorithm.
-
Select an algorithm type.
-
Complete the form to the right to name and describe your new algorithm.
-
Click Save.
Choosing an Algorithm Framework
See Out Of The Box Secure Methods/Algorithms for detailed description on each Algorithm Framework. The algorithm framework you choose will depend on the format of the data and your internal data security guidelines.
Secure Lookup Algorithm Framework
To add a secure lookup algorithm:
-
In the upper right-hand corner of the Algorithm tab, click Add Algorithm.
-
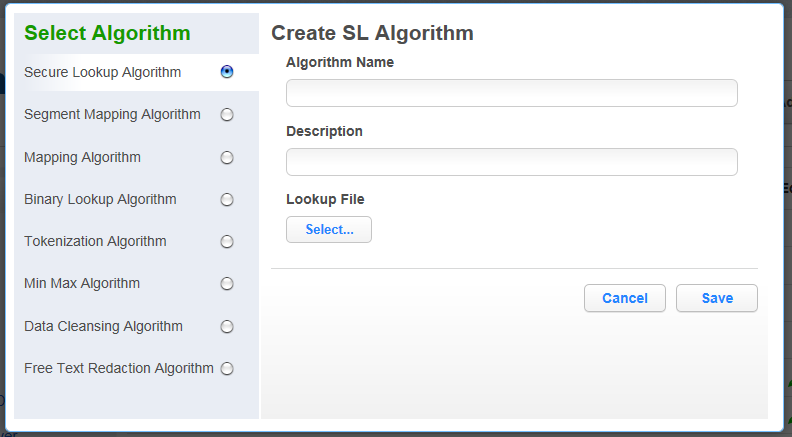
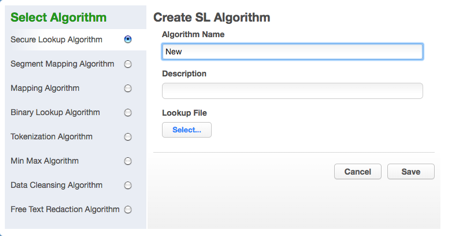
Choose Secure Lookup Algorithm. The Create SL Algorithm pane appears.
-
Enter a Algorithm Name.
Info
This MUST be unique.
-
Enter a Description.
-
Specify a Lookup File.
This file is a single list of values. It does not require a header. Make sure there are no spaces or returns at the end of the last line in the file. The following is sample file content:
Smallville
Clarkville
Farmville
Townville
Cityname
Citytown
Towneaster
-
When you are finished, click Save.
-
Before you can use the algorithm in a profiling job, you must add it to a domain.
Info
The masking engine supports lookup files saved in ASCII or UTF-8 format only. If the lookup file contains foreign alphabet characters, the file must be saved in UTF-8 format with no BOM (Byte Order Marker) for Masking Engine to read the Unicode text correctly. Some applications, e.g. Notepad on Windows, write a BOM (Byte Order Marker) at the beginning of Unicode files which irritates the masking engine and will lead to SQL update or insert errors when trying to run a masking job that applies a Secure Lookup algorithm that has been created based on a UTF-8 file that included a BOM.
Segmented Mapping Algorithm Framework
-
In the upper right-hand region of the Algorithm tab, click Add Algorithm.
-
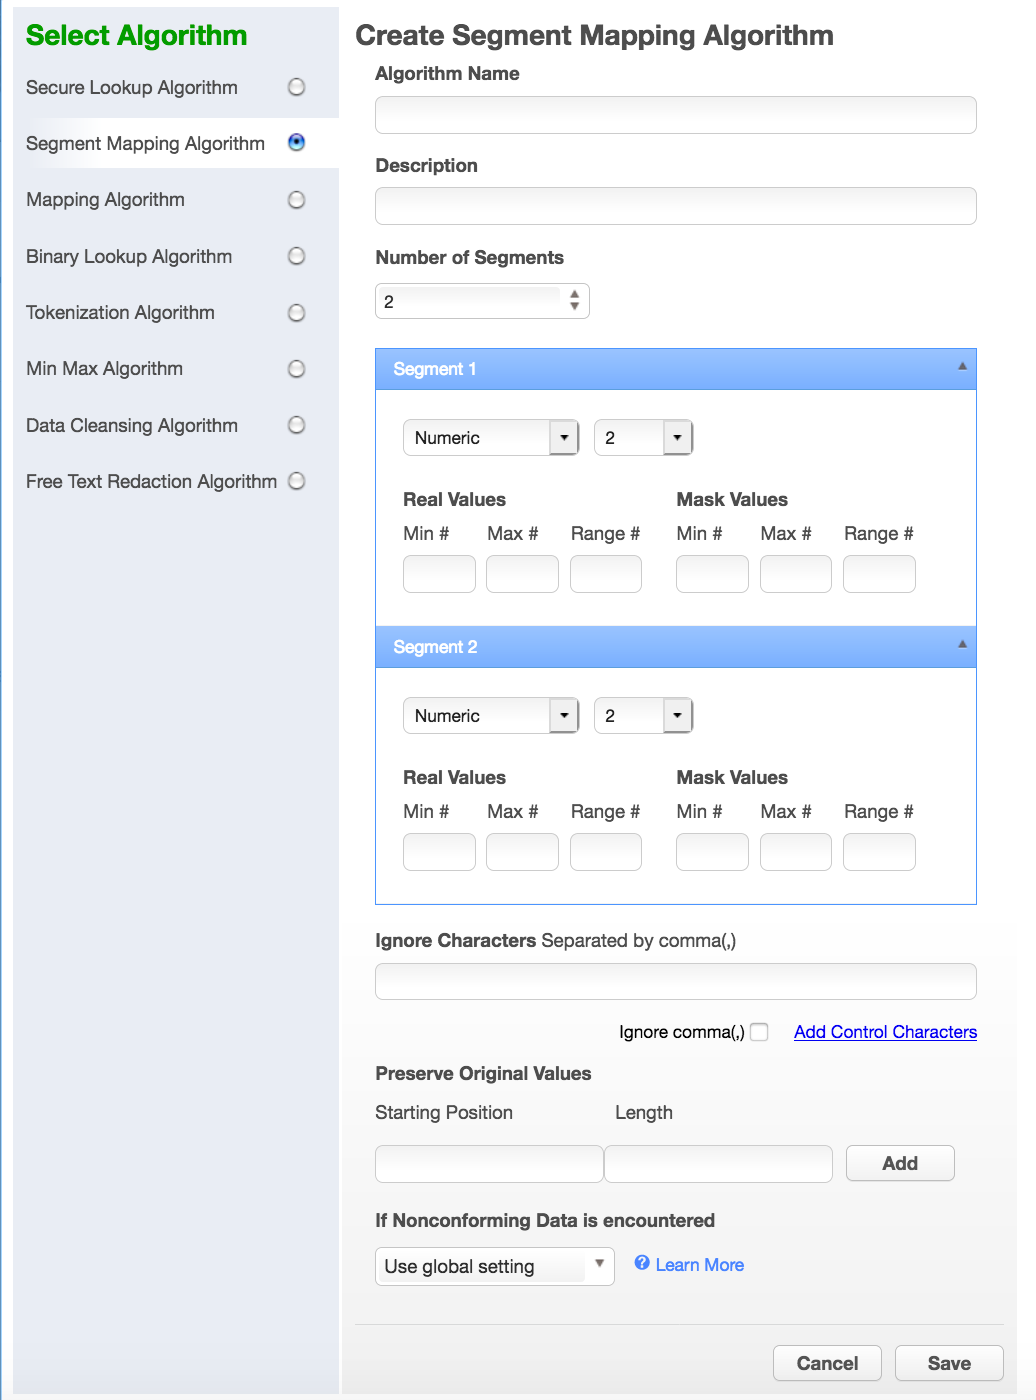
Select Segment Mapping Algorithm. The Create Segment Mapping Algorithm pane appears.
-
Enter a Rule Name.
-
Enter a Description.
-
From the No. of Segment drop-down menu, select how many segments you want to mask.
NOTE
This number does NOT include the values you want to preserve.
The minimum number of segments is 2; the maximum is 9. A box appears for each segment.
-
For each segment, choose the Type of segment from the dropdown: Numeric or Alphanumeric.
Info
Numeric segments are masked as whole segments. Alphanumeric segments are masked by individual character.
-
For each segment, select its Length (number of characters) from the drop-down menu. The maximum is 4.
-
Optionally, for each segment, specify range values. You might need to specify range values to satisfy particular application requirements, for example. See details below.
-
Preserve Original Values by entering Starting position and length values. (Position starts at 1.) For example, to preserve the second, third, and fourth values, enter Starting position 2 and length 3.
If you need additional value fields, click Add.
-
To override the behavior of the segment mapping algorithm when it encounters data values in an unexpected format, you can change the selection under If Nonconforming data is encountered. By default, the segment mapping algorithm will Use global setting as specified on the Algorithm Settings page. Selecting Mark job as Failed will instruct the segment mapping algorithm to throw an exception that will result in the job failing. Selecting Mark job as Succeeded will instruct the segment mapping algorithm to ignore the nonconforming data and not throw an exception. Note that Mark job as Succeeded will result in the nonconforming data not being masked should the job succeed, but the Monitor page will display a warning that can be used to report the nonconforming data events.
-
When you are finished, click Save.
-
Before you can use the algorithm in a profiling job, you must add it to a domain. If you are not using the Masking Engine Profiler to create your inventory, you do not need to associate the algorithm with a domain.
Specifying Range Values
You can specify ranges for Real Values and Mask Values. With Real Values ranges, you can specify all the possible real values to map to the ranges of masked values. Any values NOT listed in the Real Values ranges would then mask to themselves.
Specifying range values is optional. If you need unique values (for example, masking a unique key column), you MUST leave the range values blank. If you plan to certify your data, you must specify range values.
When determining a numeric or alphanumeric range, remember that a narrow range will likely generate duplicate values, which will cause your job to fail.
-
To ignore specific characters, enter one or more characters in the Ignore Character List box. Separate values with a comma.
-
To ignore the comma character (,), select the Ignore comma (,) check box.
-
To ignore control characters, select Add Control Characters. The Add Control Characters window appears.
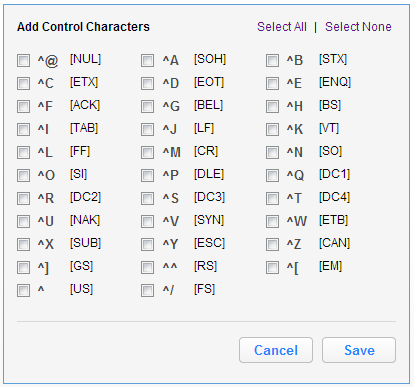
-
Select the individual control characters that you would like to ignore, or choose Select All or Select None.
-
When you are finished, click Save.
-
You are returned to the Segment Mapping pane.
Numeric segment type
-
Min# — A number; the first value in the range. Value can be 1 digit or up to the length of the segment. For example, for a 3-digit segment, you can specify 1, 2, or 3 digits. Acceptable characters: 0-9.
-
Max# — A number; the last value in the range. Value should be the same length as the segment. For example, for a 3-digit segment, you should specify 3 digits. Acceptable characters: 0-9.
-
Range# — A range of numbers; separate values in this field with a comma (,). Value should be the same length as the segment. For example, for a 3-digit segment, you should specify 3 digits. Acceptable characters: 0-9.
Info
If you do not specify a range, the Masking Engine uses the full range. For example, for a 4-digit segment, the Masking Engine uses 0-9999.
Alphanumeric segment type
-
Min# — A number from 0 to 9; the first value in the range.
-
Max# — A number from 0 to 9; the last value in the range.
-
MinChar — A letter from A to Z; the first value in the range.
-
MaxChar — A letter from A to Z; the last value in the range.
-
Range# — A range of alphanumeric characters; separate values in this field with a comma (,). Individual values can be a number from 0 to 9 or an uppercase letter from A to Z. (For example, B,C,J,K,Y,Z or AB,DE.)
Info
If you do not specify a range, the Masking Engine uses the full range (A-Z, 0-9). If you do not know the format of the input, leave the range fields empty. If you know the format of the input (for example, always alphanumeric followed by numeric), you can enter range values such as A2 and S9.
Warning
The Segment Mapping pattern and sub-patterns need to match the data in order for it to be masked. If the data is longer than the defined pattern it will be passed through unmasked. To avoid this unwanted behavior - patterns (segments), Ignore Characters, and Preserve Original Values should be set to match the data.
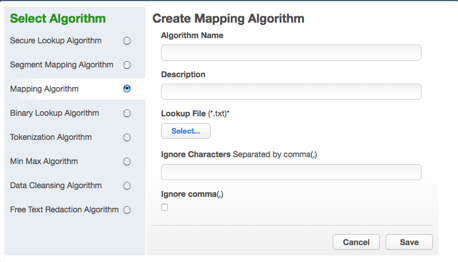
Mapping Algorithm Framework
To add a mapping algorithm:
-
In the upper right-hand corner of the Algorithm tab, click Add Algorithm.
-
Select Mapping Algorithm.
-
The Create Mapping Algorithm pane appears.
-
Enter a Rule Name. This name MUST be unique.
-
Enter a Description.
-
Specify a Lookup File.
-
The value file must have NO header. Make sure there are no spaces or returns at the end of the last line in the file. The following is sample file content. Notice that there is no header and only a list of values.
Smallville
Clarkville
Farmville
Townville
Cityname
Citytown
Towneaster
-
To ignore specific characters, enter one or more characters in the Ignore Character List box. Separate values with a comma.
-
To ignore the comma character (,), select the Ignore comma (,) check box.
-
When you are finished, click Save.
Before you can use the algorithm by specifying it in a profiling job, you must add it to a domain. If you are not using the Masking Engine Profiler to create your inventory, you do not need to associate the algorithm with a domain.
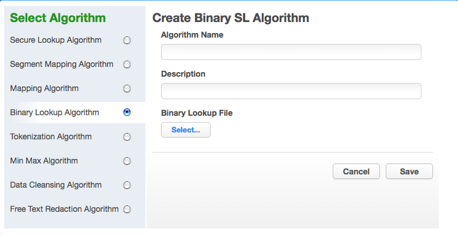
Masking Binary Lookup Algorithm Framework
To add a binary lookup algorithm:
-
At the top right of the Algorithm tab, click Add Algorithm.
-
Select Binary Lookup Algorithm. The Binary SL Rule pane appears.
-
Enter a Rule Name.
-
Enter a Description.
-
Select a Binary Lookup File on your filesystem.
-
Click Save.
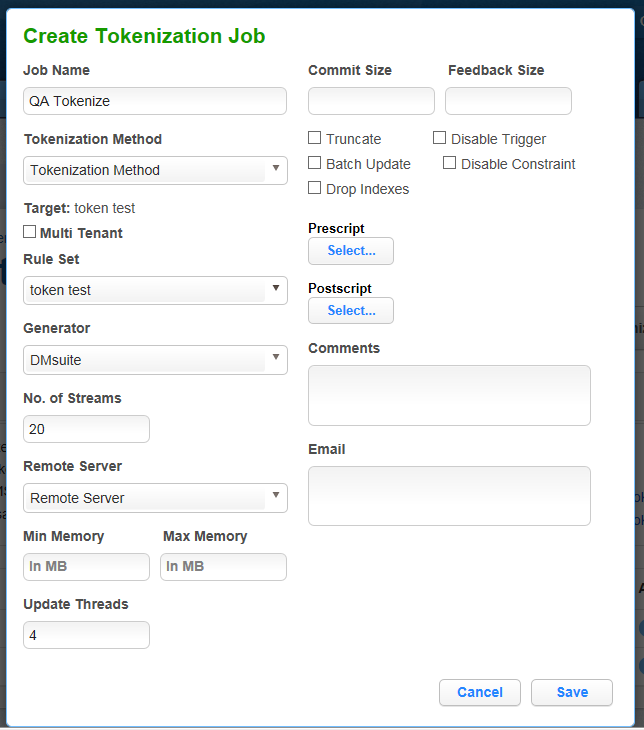
Tokenization Algorithm Framework
To add a Tokenization algorithm:
-
Enter algorithm Name.
-
Enter a Description.
-
Click Save.
Once you have created an algorithm, you will need to associate it with a domain.
-
Navigate to the Home>Settings>Domains page and click Add Domain.
-
Enter a domain name.
-
From the Tokenization Algorithm Name drop-down menu, select your algorithm.
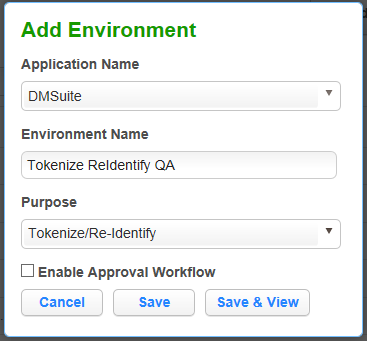
Next, create a Tokenization Environment:
-
On the home page, click Environments.
-
Click Add Environment.
-
For Purpose, select Tokenize/Re-Identify.
-
Click Save.
Info
This environment will be used to re-identify your data when required.
-
Set up a Tokenize job using tokenization method. Execute the job.
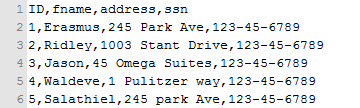
Here is a snapshot of the data before and after Tokenization to give you an idea of what the it will look like.
Before Tokenization
After Tokenization

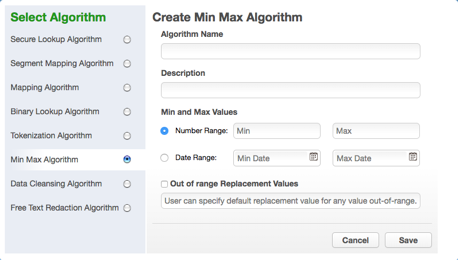
MIN Max Algorithm Framework
The Delphix Masking Engine provides a "Min Max Algorithm" to normalize data within a range – for example, 10 to 400. Values that are extremely high or low in certain categories allow viewers to infer someone’s identity, even if their name has been masked. For example, a salary of $1 suggests a company’s CEO, and some age ranges suggest higher insurance risk. You can use a min max algorithm to move all values of this kind into the midrange. This algorithm allows you to make sure that all the values in the database are within a specified range.
If the Out of range Replacement Values checkbox is selected, a default value is used when the input cannot be evaluated.
-
Enter the Algorithm Name.
-
Enter a Description.
-
Enter Min Value and Max Value.
-
Click Out of range Replacement Values.
-
Click Save.
Example: Age less than 18 years - enter Min Value 0 and Max Value 18.
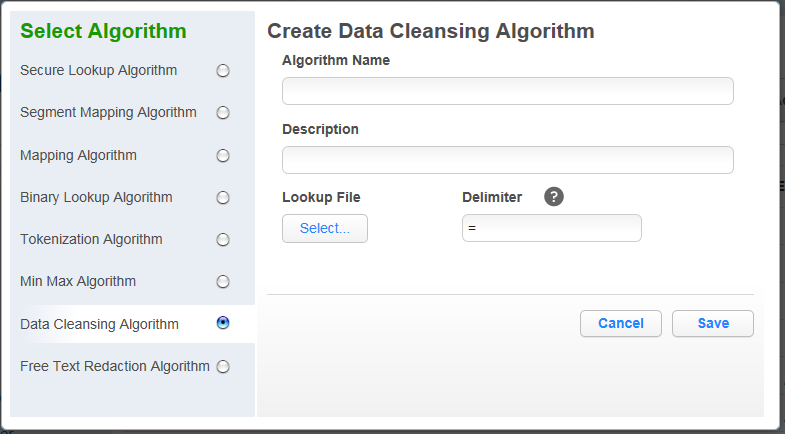
Data Cleansing Algorithm Framework
A data cleansing algorithm does not perform any masking. Instead, it standardizes varied spellings, misspellings, and abbreviations for the same name. For example, “Ariz,” “Az,” and “Arizona” can all be cleansed to “AZ.” Use this algorithm if the target data needs to be in a standard format prior to masking.
-
Enter an Algorithm Name.
-
Enter a Description.
-
Select Lookup File location.
-
Specify a Delimiter (key and value separator). The default delimiter is =. You can change this to match the lookup file.
-
Click Save.
Below is an example of a lookup input file. It does not require a header. Make sure there are no spaces or returns at the end of the last line in the file. The following is sample file content:
NYC=NY
NY City=NY
New York=NY
Manhattan=NY
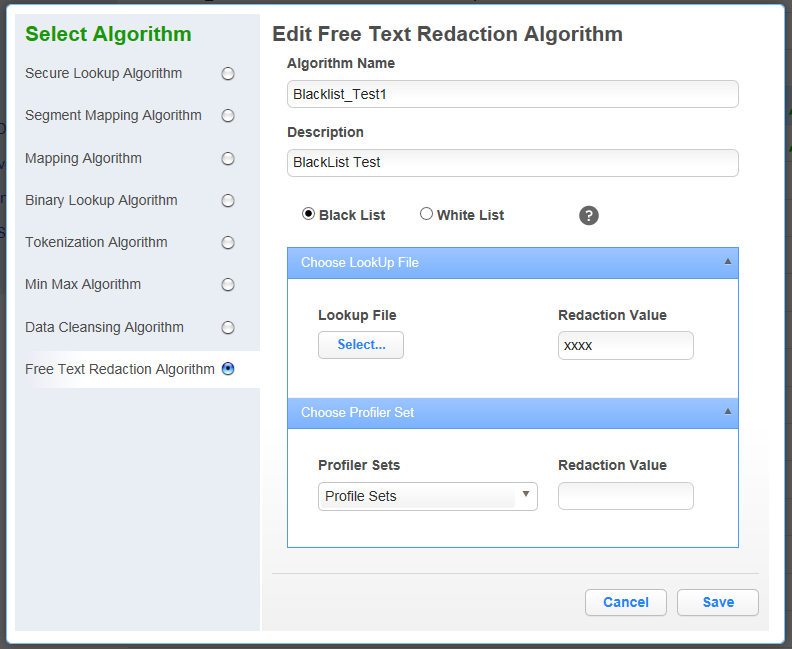
Free Text Algorithm Framework
To add a free text redaction algorith:
-
Enter an Algorithm Name.
-
Enter a Description.
-
Select the Black List or White List radio button.
-
Select Lookup File and enter Redaction Value OR/AND
-
Select Profiler Sets from the drop-down menu and enter Redaction Value.
-
Click Save.
Free Text Redaction Example
-
Create Input File.
-
Create input file using notepad. Enter the following text:
The customer Bob Jones is satisfied with the terms of the sales
agreement. Please call to confirm at 718-223-7896.
-
Save file as txt.
-
Create lookup file.
-
Create a lookup file.
-
Use notepad to create a txt file and save the file as a TXT. Be sure to hit return after each field. The lookup flat file contains the following data:
Bob
Jones
Agreement
-
Create an Algorithm
You will be prompted for the following information:
-
For Algorithm Name, enter Blacklist_Test1.
-
For Description, enter Blacklist Test.
-
Select the Black List radio button.
-
Select LookUp File.
-
Enter redaction value XXXX.
-
Click Save.
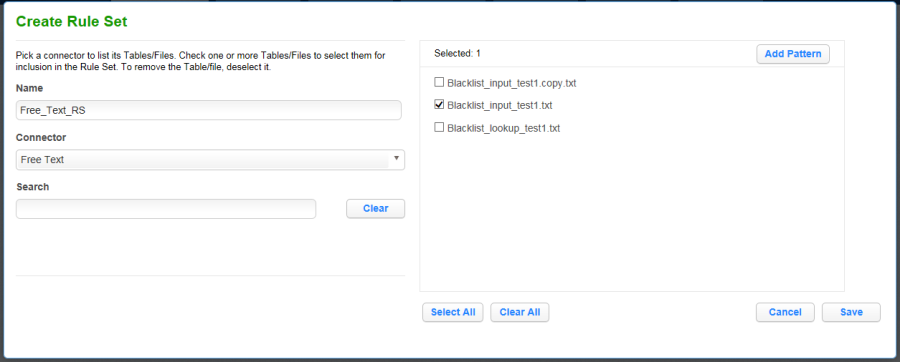
Create Rule Set
-
From the job page go to Rule Set and Click Create Rule Set.
-
For Rule Set Name, enter Free_ Text_RS.
-
From the Connector drop-down menu, select Free Text.
-
Select the Input File by clicking the box next to your input file
-
Click Save.
Create Masking Job
-
Use Free_Text Rule Set
-
Execute Masking job.
The results of the masking job will show the following:
The customer xxxx xxxx is satisfied with the terms
of the sales xxxx. Please call to confirm at 718-223-7896.
"Bob," "Jones," and "agreement" are redacted.