Users and Roles
The Delphix Masking Service has a flexible and robust users and roles system that allows you to give users fine-grain privileges over what environments they have access to and what tasks they can and can not perform.
What are Roles?
A defined role is what is used to give a certain user privileges over certain environments and tasks. Roles can be defined by selecting a subset of actions that can be taken on certain objects.
Actions
When defining a role, you can select one or more of the following actions for the role to be able to perform:
-
View: Be able to view the object and important information about the object.
-
Add: Be able to add an instance of an object.
-
Update: Be able to update/edit an instance of an object.
-
Delete: Be able to delete an instance of an object.
-
Copy: Be able to create a copy of an object.
-
Export: Be able to export an object from a Delphix Engine.
-
Import: Be able to import an exported object into a Delphix Engine
Please note that not all of these actions are available for all objects in the masking service.
Objects
When defining a role, permission to perform the above actions can be defined on a per-object basis. These objects include:
| General | Jobs | Settings |
|---|---|---|
| Environment | Profile Job | Domains |
| Connection | Masking Job | Algorithms |
| Ruleset | Profiler | |
| Inventory | Profiler Set | |
| Custom Algorithms | ||
| File Format | ||
| Users | ||
| Diagnostic |
Please see Delphix Masking Terminology for definitions of these objects.
Adding A Role
To add a role follow these steps:
1. Login into the Masking Engine and select the Settings tab.
2. Click the Add Roles button.
3. Enter a Role Name. The far-left column lists the items for which you can set privileges.
4. Select the checkboxes for the corresponding privileges that you want to apply. If there is no checkbox, that privilege is not available. For example, if you want this role to have View, Add, Update, and Run privileges for masking jobs, select the corresponding checkboxes in the Masking Job row.
5. When you are finished assigning privileges for this Role, click Submit.
Recommended Roles
While every organization will differ in what users and roles they define, we have found that the following roles are common/popular:
-
Administrator — Unrestricted access to all the engine functions. The Admin role is assigned via the checkbox in the add user page of the UI.
-
IT Security Analyst — Unrestricted access for all settings functions; access to all application functions except environment and environment create, delete, update.
IT Security Analyst role JSON
-
All Privileges — Unrestricted access for an application environment; central admin or security analyst will determine if this role can modify settings.
All Privileges role JSON
-
DBA — Manage connections for application database, scripting and scheduling (no settings).
DBA role JSON
-
SME/Analyst/Developer — Manage inventories, create, view jobs.
SME/Analyst/Developer role JSON
-
Operator — All job privileges.
Operator role JSON
-
Environment Owner — Approve workflow and inventories, privileges to view for settings and environment.
Environment Owner role JSON
NOTE - One Role per User
Please note that each defined user can only have one role assigned to them.
What are Users?
Once you have your roles defined, it is time to create users with those roles. We highly recommend creating independent users for each individual who will have access to the masking service.
Adding a User
To create a new user follow these steps:
-
Login into the Masking Engine and select the Admin tab.
-
Click Add User at the upper right of the Users screen.
-
You will be prompted for the following information:
-
First Name — The user's given name
-
Last Name — The user's surname
-
User Name — The login name for the user
-
Email — The user's e-mail address (mailable from the Delphix Masking Engine server for purposes of job completion e-mail messages)
-
Password — The password that the Delphix Masking Engine uses to authenticate the user on the login page. The password must be at least six characters long but no longer than 12 characters, and contain a minimum of one uppercase character, one wild character (!@#$%^&*), and one number.
-
Confirm Password — Confirm the password with double-entry to avoid data entry errors.
-
Administrator — (Optional) Select the Administrator checkbox if you want to give this user Administrator privileges. (Administrator privileges allow the user to perform all Delphix Masking Engine tasks, including creating and editing users in the Delphix Masking Engine.) If you select the Administrator checkbox, the Roles and Environments fields disappear because Administrator privileges include all roles and environments.
-
Role — Select the role to grant to this user. The choices here depend on the custom roles that you have created. You can assign one role per user name.
-
Environment — Enter as many environments as this user will be able to access. Granting a user access to a given environment does not give them unlimited access to that environment. The user's access is still limited to their assigned role.
-
-
When you are finished, click Save.
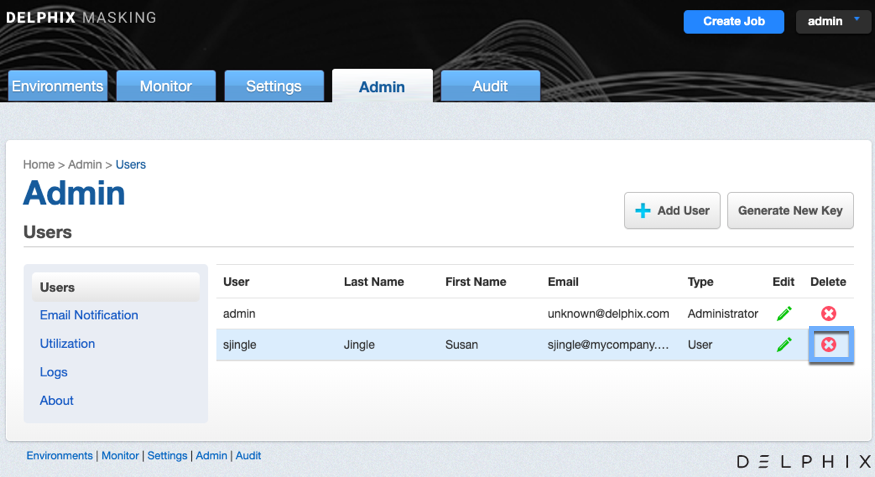
Deleting A User
-
Login into the Masking Engine and select the Admin tab.
-
Select the Delete icon next to the user you want to delete.
|
-
In the confirmation box select OK.